VIDEO: Soil Installation into Confined Space
/0 Comments/in Blower Truck Services, Environment, Green Infrastructure, Sustainable Development /by Tanya RichardsGet up to 10X AIR MILES® Reward Miles!
/0 Comments/in Agriculture Journal, Announcement, Corporate News, Landscape Mulch, Landscape Supply, Spring Landscape Ideas /by Tanya RichardsTop Applications for Structural Soil
/0 Comments/in Landscape, Municipal and Infrastructure Journal, Sustainable Development /by Tanya RichardsWhere is Structural Soil Used?
/2 Comments/in Environment, Soil, Sustainable Development /by Tanya Richards
Where is Structural Soil Used?
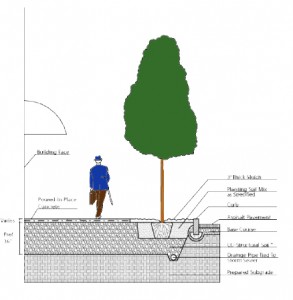 After some experience with gardening and landscaping, you will find that in some cases, standard soil just won’t do. You may need to provide a better, more solid base for large plants such as trees and bushes to grow successfully. This is where knowing about structural soil will help.
Structural soil contains larger solid particles and provides more structure that normal soil. These added solid particles create a firm structural base while allowing plant and tree roots to weave around the soil pockets. Structural soil is comprised of a mixture of gap-graded gravels, which are typically made from crushed stone, a hydrogen stabilizing agent and clay loam. This type of soil is perfect when planning to plant trees, especially beside pavement sidewalks or roadways.
Changing Landscaping
Can you picture walking on a beautifully, manicured concrete walkway? Most likely you picture a tree beside this walkway that helps to shape this beautiful image. Structural engineers more often than not will focus on the construction of the concrete walkway or the surrounding road, neglecting the need for a green environment. For this reason, landscape designers are quite important, as they know to choose the right soil for the right result.
By working together with structural engineers, landscape designers are able to successfully grow trees in paved areas. This is normally a challenge due to inadequate soil volume, which is a major requirement for root growth. Soils found under the pavement are usually very compacted, which is the reason why they are unable to support root growth. Only a few trees grow under pavement and when they do, they grow very poorly, dying eventually. It is also worth noting that with the wrong soil the pavement ends up being affected by the root growth. That is why there is need for use of structural soil.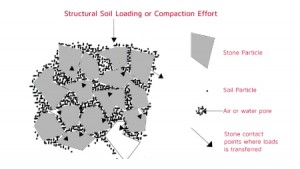
Best Places for Structural Soil
Structural soil has become the best solution for tree-growing in urban settings. This type of soil has been proven to improve tree growth in paved areas, therefore it is the best way to promote street tree planting. Structural soil is used to provide a solid base, which is meant to support masses and at the same time allow for the growth of roots. The result is a perfect crack-free pavement, with a healthy tree growing as expected.
Not all structural soils are the same. They come in different specifications, which are suited for various weather conditions. All the elements that make up structural soil are mixed together. The mix retains a void to allow for water and air movement and gives room for root growth. When used properly, structural soil can allow deep penetration of roots so as to avoid surface heating, which often affects growing trees. Encouraging deep penetration of roots is also good to allow the roots to find sufficient water, necessary for tree growth. This is a great benefit since trees whose roots grow deeply are less likely to lift and crack pavements, leaving you with a great looking pavement and an amazing green environment.
 Both structural engineers and landscapers benefit from the use of structural oil. Engineers appreciate a firm foundation for the pavement and landscapers realize trees with sufficient root volume, air and water for growing trees. Structural soil is becoming more recognized in urban settings as it provides an excellent solution for the people within these areas. It satisfies the need to enjoy good roads and a perfect environment at the same time. It is a lasting solution for both structural engineers and landscapers.
Save
Bark Mulch, the Ultimate Weed Suppressant
/0 Comments/in Fall Landscape Ideas, Landscape, Landscape Journal, Landscape Mulch /by Tanya RichardsYou have spent hours creating a beautiful yard. You have cleared the area where you envision blooming flowers, lush green shrubs, and perhaps even your grandmothers’ forget-me-nots. You painstakingly chose the appropriate locations for each of your new additions, place them with care, and begin the perfect regimen of fertilizer, water, and sunshine.
And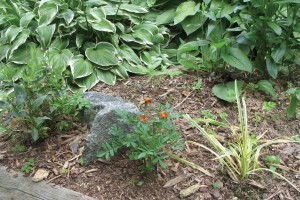 then, the weeds begin.
These garden bullies seek to overtake your garden and sap nutrients from your beloved plantlife. As prolific pests, they have found those sun-drenched spots, and you know that simply pulling them out will begin a new, almost daily routine. However, utilizing weed-killing spray may have harsh repercussions for the rest of your plants.
What is the solution?
How can you naturally and effectively keep the weeds at bay?
Bark mulch is your answer for weed suppression.
Two Reasons Why You Should Use Bark Mulch as Weed Suppression Tool
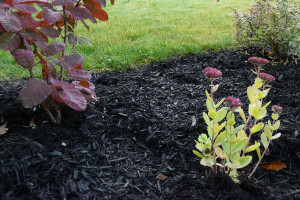 Bark mulch is the best choice for use as a weed suppressant as it inhibits weeds in two critical ways. First, by applying a thick layer covering the soil, bark mulch deprives the weed seeds in the soil, and their resulting seedlings, of the sunlight desperately needed to germinate and thrive. This prevents current weed seeds from growing.
Second, in applying a thick layer covering the soil, bark mulch inhibits weed growth in another way. Bare soil, especially nutrient-rich topsoils, offer a sort of haven for weed seeds to land and settle in. Bark mulch acts as an inhospitable barrier, stopping weed seeds in their tracks and preventing them from coming into contact with the nutrient-rich soil in the first place.
In these two ways, bark mulch can stop any potential growth of weeds; in fact, the use of bark mulch can reduce weed growth by as much as 90 percent. The plants surrounded by bark mulch are then free to thrive without the needless competition for soil nutrients.
The Other Benefits of Using Mulch
While using bark mulch for weed suppression could be reason enough, there are plenty of other great benefits to be had when you apply mulch in your landscapes:
- Helps retain soil moisture. Maintaining a consistent amount of moisture in the soil around your plants is a key factor in keeping them healthy and thriving. Mulch helps prevent moisture from evaporating too quickly, thus allowing plants to be healthy for longer, especially in the heat of summer.
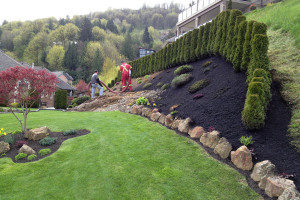 Feeds the soil. Organic mulches, such as bark mulches, break down gradually over time to add extra nutrients and organic matter to your soil. These types of organic matter are further broken down by worms and other microbes to enrich the soil and promote the healthier growth of your plant life.
- Prevents heaving. In the autumn and winter months, bark mulch can also be helpful in preventing a phenomenon referred to as “heaving”. When the water in the soil freezes at night and then thaws during the day, this cycle can actually cause plants to pop out of the soil (known as “heaving”), which can, of course, be the end of your plant’s life.
With all these amazing benefits, bark mulch is your ultimate option for weed suppression. Help your plants grow without competition, in rich and moist soil year-round with one of our premium mulch options.
Save
Fall Landscaping Care: 6 Steps to Take Right Now
/1 Comment/in Fall Landscape Ideas, Landscape, Landscape Journal /by Tanya RichardsFall Landscaping Care – 6 Steps to Take Right Now
With autumn nearly upon us and winter just past the fall bend, you’re probably not spending much time thinking about your lawn. But autumn, with its cooler temperatures and occasional rainfall, is the ideal time to prepare your lawn for next spring. (I know, next spring, really!!!)
Many homeowners think lawns need less care in the fall because the grass grows more slowly. In fact, just the opposite is true. During this time of year, grass is busily absorbing energy, moisture, and nutrients in preparation for a long, dormant winter. Give it a little attention now, and you’ll be rewarded with a lush, healthy spring lawn. Just follow these six tips.
Tip #1 KEEP ON MOWING
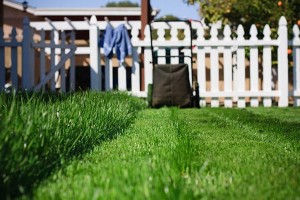 This seems a little self explanatory but it is important. (I’ll admit I’m guilty of ignoring this step in order to take advantage of the last little bit of good weather! ) Continue to water and mow your lawn, as needed, throughout the fall. As fall comes to a close and winter is just around the corner (usually Halloween for all of us in BC), drop the mower’s blade to its lowest setting for the last two cuttings of the year. That will allow more sunlight to reach the crown of the grass, and there will be less leaf to turn brown during the winter.
**Note: When you lower your mower blade, remember to do it gradually. If you take off too much of the blades of grass you could do more harm then good and make the lawn weak heading into the cold of winter. Reset the mower blade gradually to prevent any damage.
Tip #2 AERATE THE SOIL
Fall is also an ideal time to aerate your lawn so that oxygen, water, and fertilizer can easily reach the grass’s roots. You can rent a gas-powered, walk-behind lawn aerator for about $70 per day. The 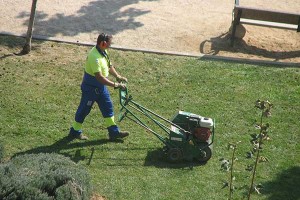 self-propelled machine will quickly punch holes into the soil and extract plugs of dirt. If you’ve got a very large yard—say, more than 3 or 4 acres—and don’t feel like aerating it yourself, hire a landscaping contractor.
Tip #3 RAKE THE LEAVES
I know raking leaves is no one’s idea of fun, but it’s important to remove fallen leaves from your lawn as soon as possible. You can either just go straight for the rake and manually pull up the leaves or you can use a power blower (gas or electric) to blow the leaves into a pile first and then rake the final few and place them in a compost bag. Make sure you don’t wait until all the leaves have fallen from the trees to start raking. If you do, the leaves will become wet from rain and morning dew, stick together, and form an impenetrable mat that if left unmoved will suffocate the grass and breed fungal diseases. Fungal diseases are not good for any plant in your yard. 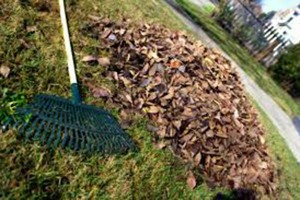
An alternative to raking leaves is to use a lawnmower fitted with a collection bag or vacuum system. These methods are particularly effective if you have a very large yard with many deciduous trees. Regardless of whether you use a rake or a lawnmower, just be sure to remove the leaves before they turn into a soggy, suffocating mess.
Tip #4 FERTILIZE FOR FUTURE GROWTH
Most lawn experts agree: If you fertilize your lawn only once a year, do it in the fall. The reason? Grass leaves grow much more slowly as the weather turns cool, but the grass roots and rhizomes continue to grow quickly. (Rhizomes are the horizontal plant stems that lie just beneath the soil’s surface; they produce the blades of grass above and the roots below.) And yes the fertilizer companies don’t necessarily like if you only fertilize once a year…but there are those that do it and there are worse things to do to your lawns. A fall application of fertilizer delivers essential nutrients for the grass to grow deep roots now and to keep nutrients on reserve for a healthy start next spring.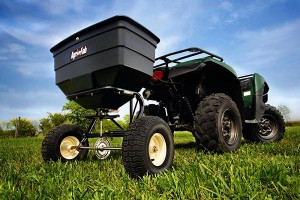
Wait until mid-to-late fall, then apply a dry lawn fertilizer to all grassy areas; be careful not to miss any spots. You could use a crank-style broadcast spreader, but for optimum coverage, consider using a walk-behind drop spreader. It takes a little longer, especially on hilly yards, but a drop spreader provides the best way to apply an even, consistent layer of fertilizer.
Tip #5 FILL IN BALD SPOTS
Autumn is also a great time of year to fix any bare, bald spots in your lawn. The quickest, easiest way to do this is with soil amender, one of our manufactured soils. 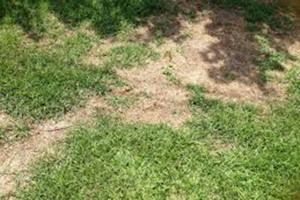
Use a garden rake to scratch loose the soil at the bald spot in your lawn. Then spread a 2-3″ thick layer of soil over the area. Hand seed over the soil, lightly compact the mixture, then water thoroughly, and continue to water every other day for two weeks.
If you have so many bald spots that you require a lawn renovation, consider Terraseeding – our process of blowing in quality soil with seed and fertilizer injected directly as it’s blown onto your lawn area.
Tip #6 WEED CONTROL
If broadleaf weeds like dandelions have taken over your lawn, now’s the time to fight back. Weeds, like most plants, are in the energy-absorbing mode during the fall. They’re drinking in everything that comes their way, including weed killers. Apply an herbicide now and the weeds won’t return in the spring. Plus you can use bark mulch early next spring on the surrounding landscape to ensure weed suppression is at it’s best. 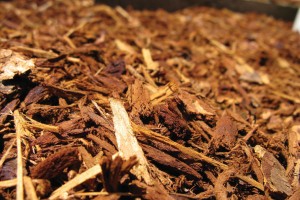
Read the package label before use. Most herbicide manufacturers recommend applying the weed killer during early-to-mid autumn, when daytime temperatures are consistently above 60 degrees Fahrenheit.
We hope you enjoyed the six tips to prepare your lawn for next year. Please feel free to read the original article here, or you can feel free to share this with your friends! Happy fall everyone.
Save
7 Habits of Successful Waterers
/0 Comments/in Landscape, Landscape Journal, Landscape Mulch /by Tanya Richards“I am not trying to be a bad waterer, I just don’t think I fully get how to be a good waterer.”
If you identify with that statement, this article may be for you.
The single most important resource in landscape care is water. In varying degree all plants need water to survive and thrive. So much time, money, and frustration can be saved with just a little attention toward proper watering practices. The excuses for not watering are as numerous as the day is long and we’ve heard them all.
Though strategic placement of landscape mulch in garden areas and around trees, shrubs and flower beds will prolong moisture retention of the soil, a consistent watering regime is still needed. The basic fact is that without water – or with too much – all life fails. It’s a simple biological fact.
You can be sure that if you practice the following seven habits religiously, you’ll see a definite improvement in the health and vigor of your plants. These habits will enable you to:
- use less water
- keeps you in touch with your plants
- turn watering into a calming activity rather than a stressful task
Read on for the full article:
7 Habits of Successful Waterers
The single most important resource in landscape care is water. In varying degree all plants need water to survive and thrive. So it stands to reason that my single biggest frustration as a landscape professional is convincing landscape owners to pay attention to watering. So much time, money, and frustration can be saved with just a little attention toward proper watering practices.
The excuses for not watering are as numerous as the day is long and I’ve heard them all. I can tell you from experience that none of them is valid, especially if you’re a shrub, tree, or other plant struggling to get a drink of water to survive. While all this may sound a little harsh, the basic fact is that without water – or with too much – all life fails. It’s a simple biological fact.
Just recently I was discussing watering with a long-time client whom I’m after every year to water more. I finally said, “You know I love you, but you are a terrible waterer.” Her response was priceless. She paused, gave me a long, low “hmmmm” and said, “Yes, I know, but maybe that is something you can help me with. I mean, I am not trying to be a bad waterer, I just don’t think I fully get how to be a good waterer.”
 John Lysak dutifully watering new annuals planted for a splash of summer color.
That made me think, “she certainly isn’t the only bad waterer; how can I help people wrestling with how much – or how little – to water?” So, at my client’s urging, I came up with these “Seven Habits for Successful Watering.” I promise you that if you practice these seven habits religiously, you’ll see a definite improvement in the health and vigor of your plants:
- Visit your plants regularly
Seriously, get to know your plants and your landscape intimately. Some areas are high and hot, other low and wet, still others feature trees and shade, while some might be wide open and exposed to the drying sun. All have different watering needs. You can’t truly know this if you don’t visit them. I take a walk every day after work as a way to decompress from the day, check in to see what is in bloom, and tend to the occasional weed patch. Yes, I am a professional…and I still find weeds in my garden!!
- Touch the soil often
Nothing provides accurate information like engaging your senses. All soils are different – do you know what types of soil you have? Is it sandy and dry? Soft and moist? Do you know if it holds water well or does it just run right through? These things matter. Get your hands in the soil and know for sure. Something as simple as seeing some wilt and then scratching at the soil at the base of the plant may tell you if that wilt is from being over dry or over wet.
- Watch the water
You can water all day long, but that’s never a good idea – it’s wasteful and counter-productive. In fact, the single biggest waste of water and cause of pollution is run-off from unmonitored watering.
If you watch water carefully, you’ll notice that at first it runs off dry soil until you achieve some saturation. Then, once fully saturated, water simply runs right through. What’s the lesson here? More is not better. You want to water just enough to enable it to soak in, and sometimes that requires a little help.
Try watering very lightly for a longer period of time. Or perhaps create a little well to hold the water and encourage it to sink in rather than run off. Try wetting the top soil, then brush it away with your hands to see how far it sunk in. Just imagine that old dry sponge at the kitchen sink – it takes a moment for the water to break that dry seal before the sponge will accept the water – same with over dry soils.
- Watch the weather
This may come as a surprise, but plants sweat just like people. Well, not exactly the same. While people have sweat glands, plants have stomata – tiny pores that dot the plant’s surfaces. Stomata enable the plant to rid itself of excess water through transpiration – a process that removes through evaporation as much as 97-99 percent of the water taken up by its roots.
Weather, then, affects transpiration just like sweating. The hotter the nights, the more plants transpire. Heat and humidity make plants “sweat” through their leaves, drying them out and putting them at risk if water isn’t replaced in a timely and efficient manner. For example, some plants love misting while others hate it.
Knowing your plants and what they like is important, just like understanding the local weather and environmental conditions. Generally speaking, we don’t need to do much watering in New England in April or May, but by the time we hit June, soils are drying up, the rains are slowing down, and plants could likely use a good drink.
- Frequency and duration
Not all plants need the same duration or frequency of watering. If you practice habits 1-4, you’ll be able to accurately gauge how much water your plants will need to stay happy and healthy. Almost all plant resource books and websites that give you plant data will suggest what a plant likes – moist soil, dry soil, loamy soil, sandy soil – these “likes” correlate with water needs. Moist and loamy soils will indicate an affinity for regular “dampness” in the soil. Dry and sandy soil lovers will be okay with periods of dry out.
- Adjust your irrigation system
Many landscapes benefit from irrigation systems, but it’s important to test and adjust them. One of the biggest issues with irrigation systems is the “set it and forget it” mindset. Many landscape owners simply set the automatic watering timer and then assume that will take care of things. But no single setting will deliver the proper amount of water throughout the three distinctly different New England growing seasons. Without making seasonal adjustments, you’re guaranteed of over-and under-watering throughout the year.
Here is something to keep in mind; in the springtime, the plant “juices” are flowing upwards from the soil to the tip tops of the trees. The plants are pulling energy, liquids, and nourishment up from their roots and pushing out new spring growth. If you envision having a cool glass of water and using a straw to pull up a refreshing drink…that is not much different than what the plants are doing. So all the trees (effectively the biggest straws) are pulling water out of the soil with great force. Rain replenishes some, but as you all know, one 80-degree day and you can feel super parched, super fast. Same goes for plants and the big ones can take up the resource faster than the little ones.
- Make watering easy
Nobody likes doing things that are difficult or frustrating. Consider turning what could be a chore into a relaxing and enjoyable experience by making the task easy!
I am a firm believer in point-of-contact watering. That’s the fancy term for using a hose or a watering can to water the ONE plant that needs it. If you have one operational spigot in your landscape you can be sure that watering won’t happen. The WORST two tasks of gardening in my opinion are dragging and coiling heavy, dirty hoses. I confess I have watched a plant suffer and die before I got around to dragging a hose out to rescue it.
Now I have a “free-line” on my irrigation system and spigots that are placed roughly every 75 to 80 feet throughout my 2.5-acre landscape. I keep a 100-foot hose coiled in several of the location and I can easily access water whenever and wherever I want.
My approach is to run the irrigation system to provide a steady moisture level — not overwatering or creating run-off. I walk my landscape every day and when a plant needs water, I grab the hose or fill a watering can and spot-water right where it’s needed. This uses less water and keeps me in touch with my plants. And, as hokey as this may sound, it provides a wonderful way to meditate and unwind from my day. Watering has turned into a calming activity rather than a stressful task.
Now don’t you feel like getting out there and watering?
The original article was posted on theGardenContinuum.com – 7 Habits of Successful Waterers.
Save
Is Coloured Mulch Safe for Your Garden
/0 Comments/in Construction Landscape Journal, Landscape Journal, Landscape Mulch, Water Abatement /by Tanya RichardsIs Coloured Mulch Safe for Your Garden?
The use of coloured mulch has increased over the last number of years, as the bold and rich colour offers an attractive look for landscaping while continuing to offer the benefits of mulching. Unlike natural, non-dyed mulch, which tends to fade to gray, coloured mulch can hold its colour for a year or longer.
However, with these benefits, public concern has also been raised regarding the use of coloured mulch. The primary question is: Is Coloured Mulch Safe for Your Garden?
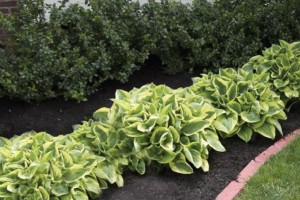
What about the dye?
The typical dyes used for colouring mulch are iron oxide-based and carbon-based. Iron oxide, used to produce red mulch, is commonly known as rust, and is used extensively in paints, cosmetics, and even used to dye flowers. Carbon, used to produce black mulch, is an element often used for ink or paint. Both bases for these dyes are considered natural, non-toxic and safe for handling. Most other colours are made with vegetable-based colourants, also from naturally occurring elements.
A study (“Are Mulch Colorants Safe”) conducted by the Mulch and Soil Council, determined that colourants typically used for coloured mulch are deemed non-toxic and when used properly, would not have any negative effects on the environment.
Of course, a savvy customer should ask about the product they are purchasing, and the company should know about their product. For example, at Denbow, we know that our mulch is coloured with non-hazardous, safe for the environment, ingredients.
What is in the wood?
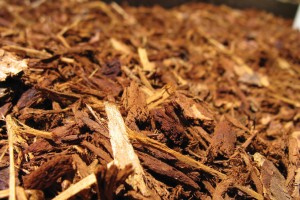
As the colourant used in coloured mulch has been generally deemed safe for use, eyes have turned to the content of the wood. The use of recycled wood is a beneficial practice for the environment, yet depending on the content of the wood, harmful toxins (such as lead) could be lingering from past uses.
When purchasing coloured mulch, then, it is important to consider the wood content. In an effort to improve the quality of our products, Denbow produces a number of our own materials, including processing our own mulches. We work with select sources of material to minimize foreign material in our finished products. Our red and black coloured mulches are made of locally recycled wood, free from these contaminants.
Will it affect the soil?
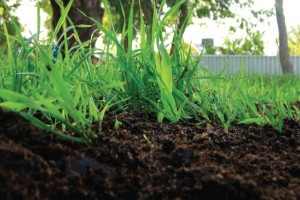
There is a concern that when using wood mulch, the carbon of the wood will interact with the nitrogen in the soil, using the nitrogen to help the decomposition process, but in turn, pulling the nutrients from the soil. Coloured mulch actually decomposes at a slower rate than regular wood mulch, which means the nitrogen is removed from the soil at a slower rate.
Use of a nitrogen-rich fertilizer is encouraged, as for whether or not mulch is used, the soil can benefit from the implementation of a regular fertilization program. It is recommended when adding new mulch, to take the time to remove old mulch or be sure to cultivate your existing mulch on a monthly basis in order to help healthy decomposition.
At the end of the day, if you are looking for a pop of colour to refresh a garden bed, or seeking to landscape a new area and considering an alternative to the natural mulch, coloured mulch is a safe and beautiful option. Is coloured mulch safe for your garden? Yes, Denbow’s coloured mulch definitely is.

